Showing posts with label Image Edititng. Show all posts

Monday, February 1, 2010

Create Awesome Sketched Images from your Photographs

Yet an another awesome photoshop only effect finally makes it way to us, and yet again its just a powerful as photoshops said effect yet its absolutely free to use.

Say hello to Fotosketcher. This freeware application allows you to create awesome sketched images from your photographs! Now you have a way to impress your close friends and relatives by giving them an image that looks professionally hand sketched – and all you have to do is fire up the software, load an image choose a sketch style and you’re on your way to becoming a pro artist!

Of course there are other uses of the software apart from boasting! For example they make a great gift accessory, imagine giving someone a Birthday card (or perhaps a get well soon card) with their sketched picture on the front! You could do the same by placing the image on other seasonal greeting stationary – heck why stop there, you can even turn the gift accessory into a full blow gift! Just make a portrait or any suitably large sized sketch and then print the newly `sketched’ photo to hang on the wall as a work of art.

sketch

As mentioned before Fotosketcher has different styles available to you, these include : pencil sketch, pen and ink drawing, various painting renderings. You can also improve your original photo with simple tools such as enhance contrast, sharpen, simplify image, increase luminosity, color saturation etc.

As usual the suprising bit is why is something like this free, what’s the catch? Once again one can’t find any other reason except that the developer was a nice guy.
FotoSketcher is completely free and claims to be free of any adware, spyware or virus. It currently runs on any version of Microsoft Windows, and if I were you I’d get it asap.
CSSdrive Provides an Easy way to Extract Colors Online

There are a lot of occasions when one need to extract colors from different pictures. For example, while setting up your Adsense on a blog you need to blend the colors with the theme so that they look more attractive to your visitors. There may be various programs to get the job done but if you are on the go and need to get the job done then you need to check out Colors Pallete Generator.

If you are a graphics designer, or in any field that requires interactions with colors, Colors Pallete Generator can prove to be an amazingly simple, and immensely useful tool.

cssdrive

The main function of this application is to extract all colors from a given picture, and then present all the colors which are included in the picture.

Let us use this picture:

example

The trained eye can see that in this picture exists an entire array of various colors which cannot be extracted easily.

Now, we proceed to upload this image to CSS Drive. You can upload an image even if it is not store on your own PC; in that case, you need to provide the URL of the image, and CSS Drive will upload it.

results

Within a second, CSS Drive extracts all the beautiful colors from the image, no matter how complex it is, and displays the color palette, classifying them as light, medium, and dark. At the bottom, you can see the complete color palette. Colors can be selected and the 8 selected colors are shown in a horizontal list to the right, which is visible in the screenshot above.

As your mouse pointer hover over a color, its hexadecimal color code is shown by CSS Drive, so you choose the same color in some other application you are running.

At the bottom of the webpage a user can see the following two options:

format

Therefore, the option of saving the colors in CSS or ACO formats is also available.

CSS Drive is a powerful, yet small and free utility which make life easier for a lot of graphic designers.

Turn Your Photos Into 3D ScreenSavers and Wallpaper Collages

The default screensaver in Windows which shows the user pictures on the PC is downright boring. That screensaver is no different than a slightly fancy slideshow. If you want to really have some quality fun with the photographs on your PC, you need to stop relying on built-in Windows programs. Today we will explore an amazing freeware

that lets you use your pictures in wonderful ways to liven your computer experience.

The freeware we will be exploring is PhotoJoy.

photo

On the program’s first run, it asks you about the folder you store your pictures in. After indexing them, you are given three options like this:

interface

You can make a collage, go to PhotoToys, or create a screensaver. We will explore at each option separately.

Collage:

Choosing Collage, you are presented with various 3D collage formats from which you can choose any:

collages

By default, you are presented with the most popular collage formats but you can look for specific type by entering the appropriate category in the left plane. To get a better idea of how it will look, you can click on any format to preview it. The collage you choose randomly selects your photo each time and alternates between different photographs each time. You can then set up these wonderful 3D collages as your desktop wallpaper.

PhotoToys:

Selecting PhotoToys present you with 3D wallpapers which you can place on your desktop. These wallpapers dynamically alter themselves by changing the photographs being displayed. Here is how my desktop looked like after PhotoToys generated my wallpaper:

photojoy

Screensavers:

Selecting screensavers present with options of screensaver animations according to which brilliant 3D screen savers area created:

screensaver

Apart from including amazing formats for Collages, PhotoToys, and Screensavers, the user can download additional formats. This way PhotoJoy keeps providing users with newer ways to have fun with their pictures and the program never gets boring.

PhotJoy is a fantastic utility to get the most fun out of your photographs.

Create Your Own Animated Videos Online With Memoov

It’s always fun to watch animations. Whether the message is serious or humorous, animations in their comic manner are successful in conveying it. While making detailed cartoon animation might require extensive training, you can still create simple (yet visually amazing) ones using various online tools and services. One such online service is Memoov.

Memoov is a website that helps you create simple animations. These animations let you choose the scene, the objects that will go in the scene, and the characters. You can even add your own music and your own audio files for the characters to say.

The first step you take in order to take advantage of Memoov’s services is register for a free account. Then you log in with the username you assigned yourself and click on the ‘Create Animated Video’ button:

Select from an array of scenes your animation will begin from (in our example I chose the swimming pool scene):

Then proceed to select a character to add in your scene:

If a character’s picture says ‘edit’ on it then you will be taken to a screen to further customize your selected character. For instance I chose the Bigfoot and I proceeded to change the color of its body parts and even his entire physique:

When you’re done, click on the ‘Add’ button which you’ll find below the character customization panel; consequently you will be taken to your selected scene with your customized character added to it. You can position him with your mouse:

You can see that besides your character you have various options available. ‘Expression’ lets you choose what expression your character has. In the following picture, I chose grumpy and Bigfoot’s face instantly reflected my choice:

‘Speak’ lets you record your voice which will then be said by your character. The recording is also done within the browser. Click on ‘Speak’ to start recording and then on the green play button to hear what you just recorded:

The ‘Walk’ button lets you move your character around, specifying the course he will be walking:

Other tools located to the left of the panel provide additional functionality. The first button lets you add more characters. The second button lets you add objects:

Using the third button, you can add text in your scene:

The last two buttons let you change the camera positioning, add effects, and select what audio/music should be playing. You can either select from the list of available songs or upload your own:

The right side of your animation panel can be used to take down notes on what each scene is about. Once you’re done with a scene, add a new scene using the bar on top of your panel.

Once you’re done with your animation, click on ‘Save & Produce’ to name your project. Use the same button if at any stage you would like to save your project:

If you choose to finalize your video, it will be processed by Memoov and then uploaded on their Youtube channel. You will be notified by email once this is done:

Animations can serve multiple purposes; you can create them for entertainment or to give your presentation

a unique touch. Whatever purpose you make them for, with Memoov you no longer need to be an animations expert to get the desired result.

Sunday, January 10, 2010

Creating a ‘difference’ in portraits

Image by Hamed Saber

I was reading a magazine where each article had the photo of the author besides it, but in a unique way: looking like something like on the right.

How to get this effect yourself? I will show you today.

In addition to Photoshop you need Microsoft Photo Editor to get this effect. You may have this already on your system, if you have MS Office or you may not - it has been discontinued by Microsoft. If you do not, you can download it from here or here: http://www.brothersoft.com/microsoft-photo-editor-128651.html.

First, open the photo in Microsoft Photo Editor, and then go to File->Properties. In the ‘Type’ field select Monochrome (1 bit) from the drop-down, and press Ok. Save the image.

Microsoft Photo Editor

Microsoft Photo Editor

Second, open the original photo in Photoshop (or any other photo editing tool like GIMP). Also open the photo modified through the photo editor. Drag the modified photo over the original, as to form a new layer on top.

Third, (for the modified image layer) bring up the Selective Color panel, by clicking on Image->Adjust->Selective Color. For ‘Colors’, select ‘Black’ from the drop-down - and choose suitable values for the sliders (or as shown below in the screenshot).

Photoshop

Photoshop

Fourth, select a suitable blending type from the layers window, and suitable Opacity which suits. For this image, we used ‘Overlay’ and 55%.

Blending

Blending

Save the image - flatten it before saving if you want, and you are done. If there is a way to do this without using Microsoft Photo Editor, please post comments.

There are variations possible, if you prefer. One is to ‘Invert’ the original image in Photoshop before submitting it to the MS Photo Editor (by going into Image->Adjust->Invert) and then proceeding as described.

The other is to use only the unicolor image produced by the MS Photo Editor, without blending it with the original. You could use a plain single color layer as the lower one, and do the selective color on the other.

Variation I

Variation I

Variation II

Variation II

Photo by Hamed Saber

Photo by Hamed Saber

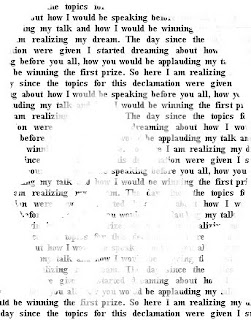
Making Letter Portraits...


Having been impressed by letter portraits (see right), I wanted to figure out how to do them myself. In addition, I have shown you a lot of my own photos on this blog, without making the readers any wiser on how to do stuff. Better late than never, they say - so lets get started.

Choose a photo that you want to convert. Not every photo is a good candidate: the photo should be simple, not having a lot of detail. A bigger size say 640 x 480 should be available, and should have some contrast. For the purpose of this tutorial we will use this tree:

Tree

The result may not look very good because the photo does not have a unique recognisable shape, but will work fine for this tutorial. You may want to try yourself with this better photo of Indian PM Manmohan Singh:

Manmohan Singh

Step 1 is to open a word editor and type (or copy!) some text into it. It looks best if the text is related to the person whose photo portrait you are making. Times new roman font is preferable, Size 14, Bold. Set the zoom to 70% for good results. Take a screen print using Alt-Print Screen key on your keyboard, and bring into Photoshop. The result looks something like this:

Text

Now crop to retain the text, and copy-paste multiple times to achieve the size you need.

Moving over to the main photo (the tree), go to Window->Show Channels. Click on each channel one by one, and see which one has the highest contrast. Retain that one, and delete the others:

Channels

Now click on Image->Mode->Grayscale and then on Image->Mode->RGB.

Finally, when your two photos are exactly the same size, drag the text over the main photo - or copy paste as a new layer. The photo with the text should be on top and the other below.

Now go back to Window->Layers, and from the blending mode (upper left corner where it says Normal), select Screen. Things should look like this:

Tree

Flatten the image by going to Layer->Flatten Image.

What you want to do after this is up to you. You may want to do Image->Adjust->Threshold for complete B&W look. For, as for example with the PM photo above, you may need to do some cleanup using the Eraser tool for a ‘clean’ look.

If all this is too much work, being a lazy person like me - try this website: http://lunatic.no/img2aschtml.php.
Upload a photo, and it creates a colored text portrait. Its beautiful and you can choose the characters. Take a screenshot (using Alt-Print Screen) of the result and crop in Photoshop, to save as an image.

If something is hard to follow, please post in comments and I will simplify. The Manmohan Singh photo is by ‘ahinsajain’.